4. VS3ZIP Script Guide for neoVI Devices
4.1 Creating a Script in Vehicle Spy 3
To utilize wireless mode and Wireless neoVI, a VS3ZIP script file must be generated in Vehicle Spy 3’s VehicleScape DAQ. The script file tells the device how to operate on its own while connected to a vehicle. The Wireless neoVI website can then send the VS3ZIP script from your PC to the neoVI Connect/RED2/FIRE3 hardware.
4.1.1 Utilizing VehicleScape DAQ
This section will show you how to make a VS3ZIP file in Vehicle Spy 3 utilizing VehicleScape DAQ.
1. Open Vehicle Spy 3 on a PC. (Connection to hardware is not needed)
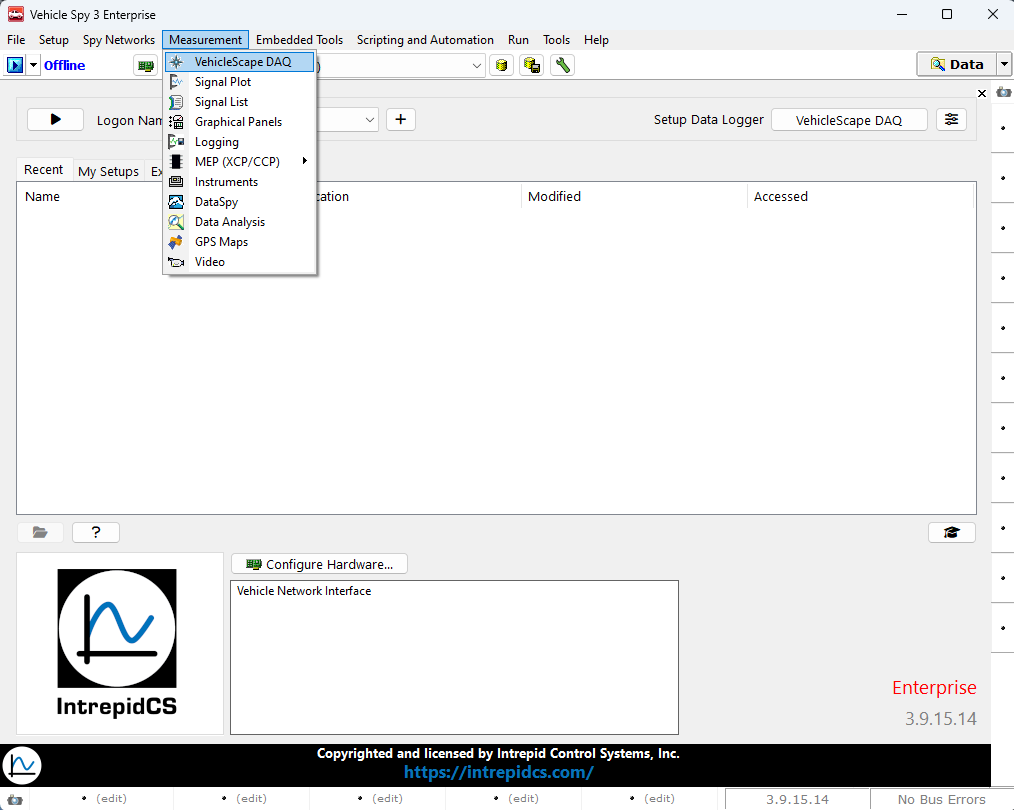
2. Click Measurement and open VehicleScape DAQ. (Figure 1)
3. Setup a platform with databases.
4. Select Channels of messages and signals to log.
5. Configure Standalone Logging options.
6. Generate the VS3ZIP script on your PC.
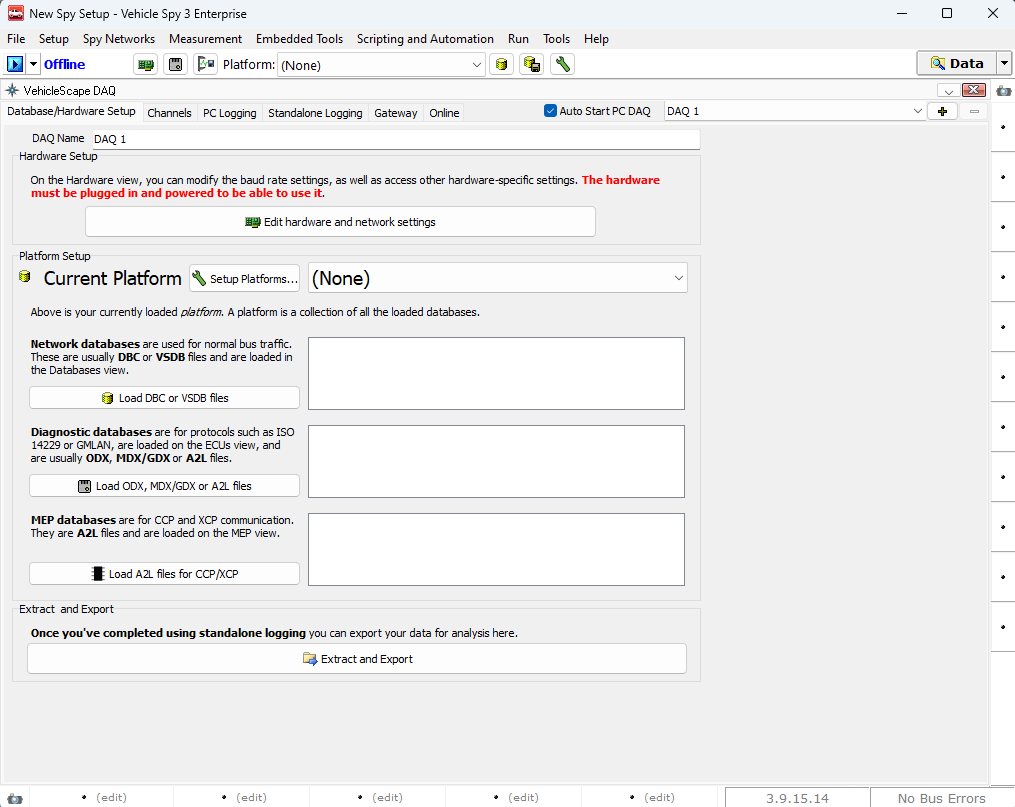
VehicleScape DAQ: Database/Hardware Setup Tab (Setup Databases)
The critical role of the Database/Hardware Setup tab (Figure 1) is to set up databases for decoding all vehicle network data. You can also use this tab to change the VS3ZIP script file name and set up neoVI Connect/RED2/FIRE3 hardware.
Setup Databases
The Platform Setup section has four parts. All database choices made here will affect the list of signals available on the Channels tab nearby.
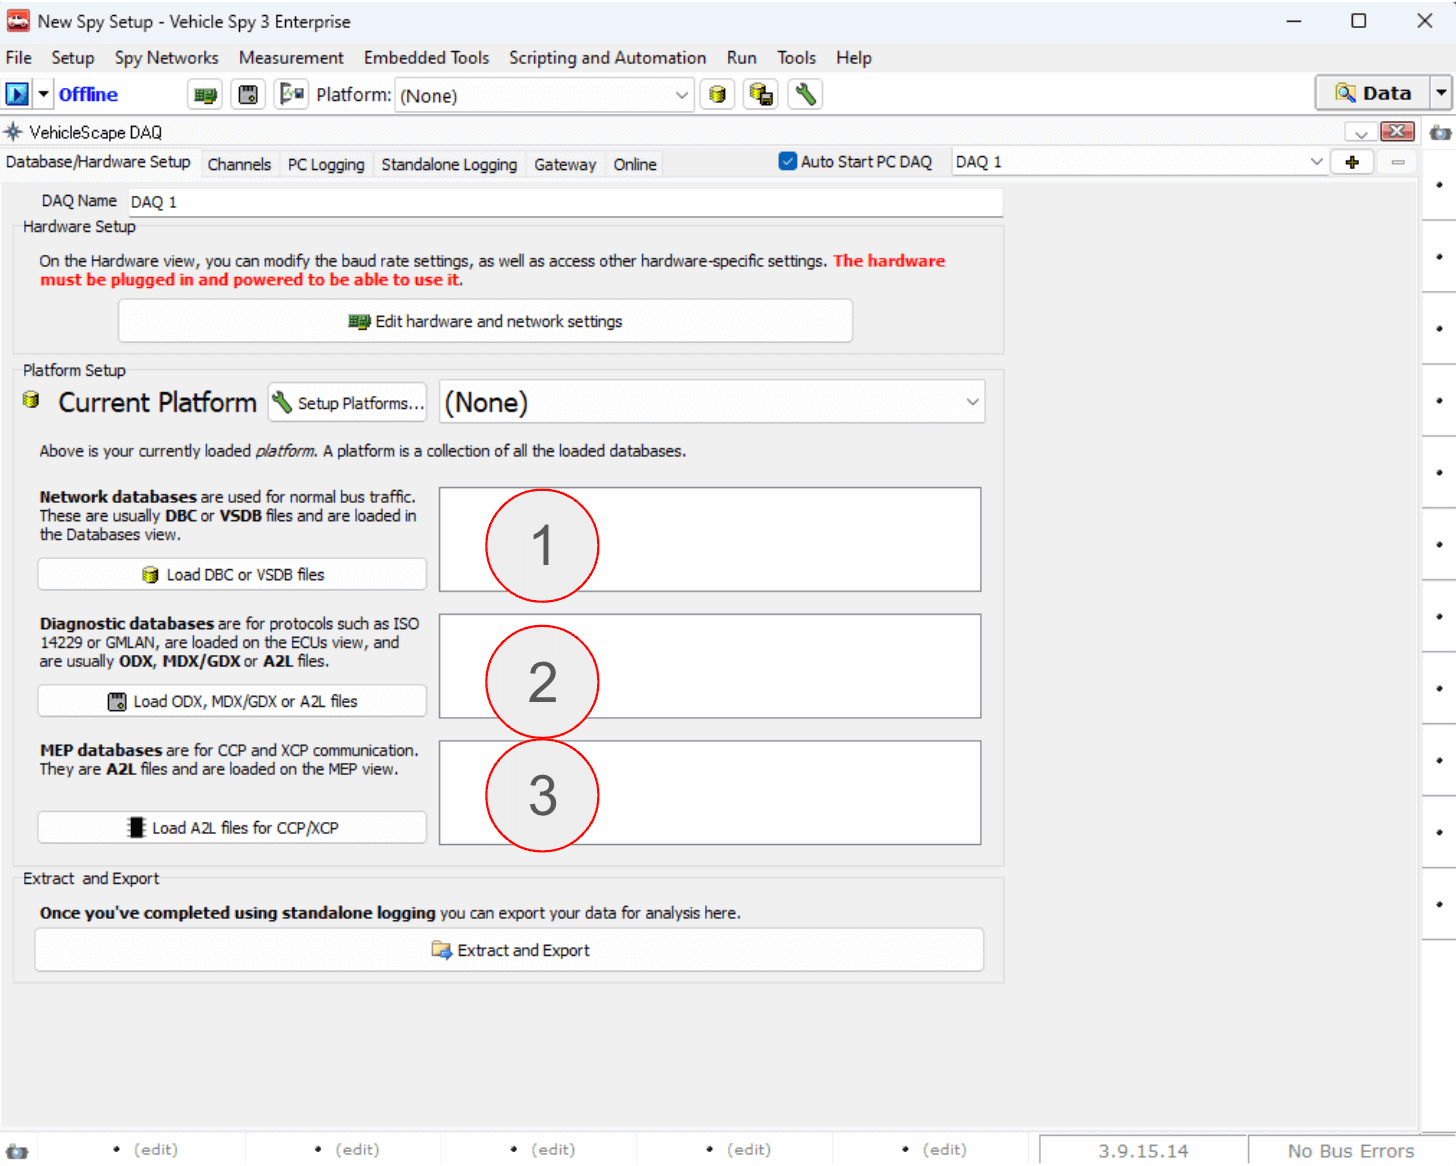
The first section is the Current Platform.
The platform consists of the entire group of databases in the next three sections. VehicleScape is very database-dependent, so selecting the correct platform is important! If the platform is not correct or does not exist yet, this section will let you correct it. To change the platforms in the list, click the Setup Platforms button to edit them.
The following section covers Network databases, which are utilized for all regular vehicle network traffic (non-diagnostic). To access the Network Databases dialog, click the Load DBC or VSDB files button.
1. Network databases
- These databases are applied to all normal mode (non-diagnostic) vehicle network traffic.
- Clicking the Load DBC or VSDB files button will bring up the Network Databases dialog.
2. Diagnostic databases
- These databases are applied to all diagnostic vehicle network traffic.
- Clicking the Load ODX, MDX/GDX, or A2L files button will take you to ECUs view where new diagnostic database files can be loaded.
3. MEP databases
- Memory Edit Protocol reads and writes ECU memory locations using A2L database files applied to CCP or XCP vehicle network traffic.
- If any are missing or need updating, the Load A2L files for CCP/XCP will display a MEP view where A2L Files can be added or updated.
Extract and Export
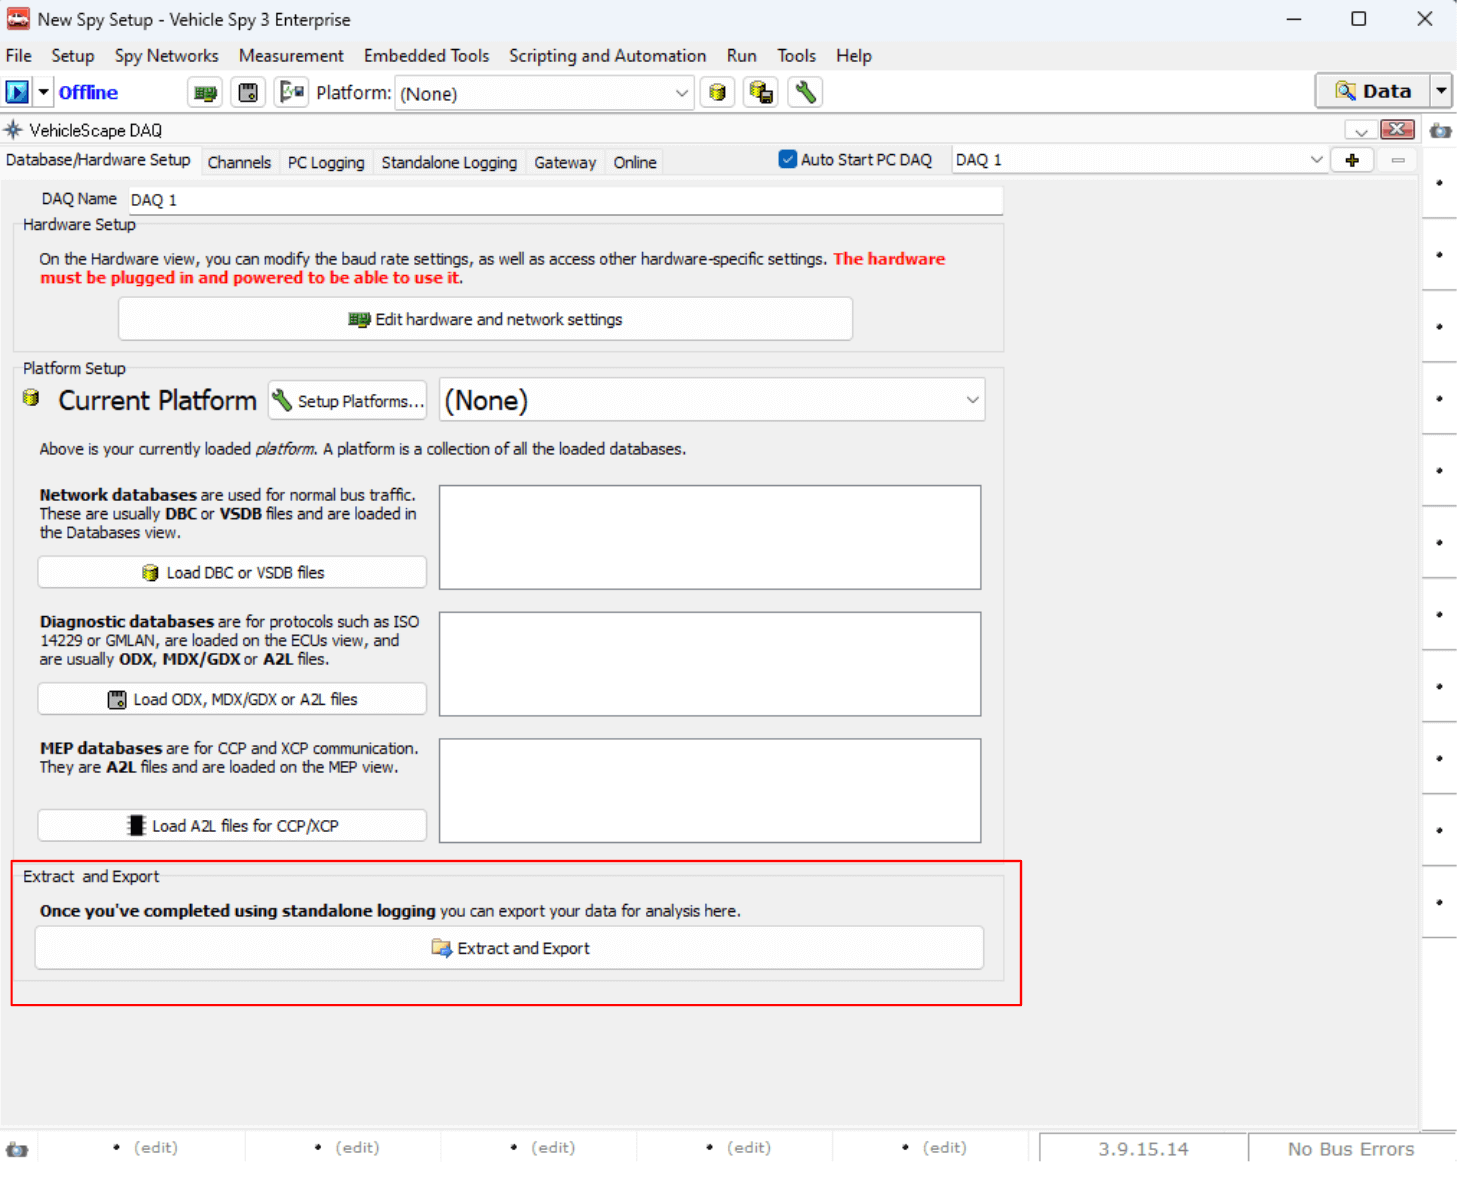
The "Extract and Export" button opens a feature that can use your PC to read an SD card taken from a neoVI, extract raw data VSB files from it, then export those VSB files to other decoded file types. For neoVI working in wireless mode this extract/export process is usually done with the Wireless NeoVI website without fumbling around with SD cards
VehicleScape DAQ: Channels Tab (Select Channels to Log)
This is step 4 in making a VS3ZIP script to operate in Wireless neoVI. The VehicleScape DAQ Channels tab is where signals are selected to log. This tab is split into left and right window panes. The left side displays a list of signals to pick from and the right side allows further adjustments to the signals selected.
Left Side of Channels Tab (Figure 1)
Utilize the left-hand panel of the tab to conduct searches and designate signals from an extensive list. This compilation encompasses messages and signals sourced from databases accessible through the adjacent Database/Hardware Setup tab, as well as data from the Messages Editor and Application Signals.
Users can refine the signal list through two methods: entering text into the search field or accessing the diagnostics button to select a diagnostic category within the network/ECU tree. Additionally, users can create groups of items by employing the press-and-hold function of the CTRL or SHIFT keys while left-clicking on the desired items.
Users have the option to designate highlighted signals for logging individually or collectively. This can be achieved by selecting signals one by one or all at once, facilitated by the respective buttons located below the search field.
The Paste List button can speed up signal selection when working with a huge list of signals. First, copy to the clipboard a list of line delimited signal names from any source, like a column in a spreadsheet. Next, click the Paste List button and Vehicle Spy will attempt to select all signals that match the clipboard entries. Specific Problem Logs will indicate any signals that Vehicle Spy could not find a match for
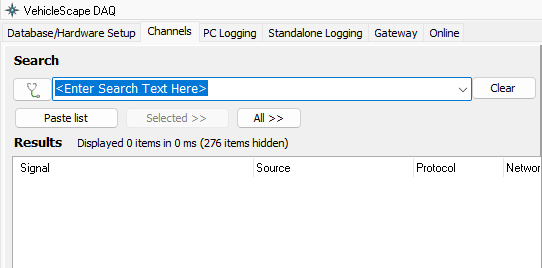
Use the left side of VehicleScape DAQ Channels to find and select signals to log. Use the right side of the tab to make adjustments to the signals selected.
Polling Setup
These polling rates determine how fast any one shot diagnostic jobs are repeated. These polling rates do NOT affect MEP A2L file data items because those items use their own MEP DAQ Delay times.
The Set Export Order button sets the ordering of signals in CSV and MAT signal export files.
If GMLAN is enabled in Vehicle Spy Tools/Options, then items from GM cal files can be loaded by clicking a CAL File button.
Selected Channels For Test
The Selected Channels for Test area in the lower half of Figure 2 displays the signals that were selected to be logged. If the signal is a PID or MEP A2L file data item then its priority (how often it gets requested) can be changed to Fast/Medium/Slow by double clicking on it. At the bottom of this area, use the Clear button to clear the entire list or the Remove button to remove signals one at a time.

Right Click Menu (Figure 3)
The Selected Channels For Test area has an extensive right click menu with selections described below in Table 1.
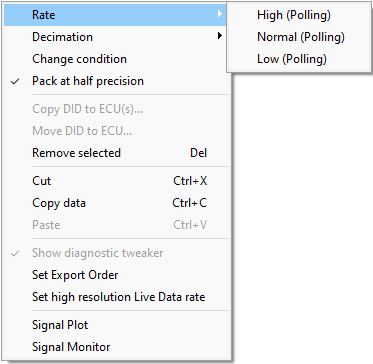
| Rt Click Menu Selection | Description |
|---|---|
| Priority High/Normal/Low | Sets the periodic rate of one shot requests sent for this item. Polling Setup defaults (ms): High = 0 / Normal = 150 / Low = 500 GMLAN DPID = job $AA/01 GMLAN PID = job $22 GMLAN Memory Data = job $23 ISO 14229 DID = job $22 (only if ISO15765 not needed) ISO 14229 Memory Data = job $23 MEP DAQ Delays (ms): High = 0 / Normal = 150 / Low = 600 MEP A2L item = MEP DAQ Delay rate |
| CCP/XCP Events | Allowed only for MEP A2L items. Selects an ECU event schedule defined in an A2L file. This is known as event based DAQ'ing. |
| Periodic Fast/Medium/Slow | Sets the periodic DPID schedule rate that this item is packed in. Per GMW3110 specification (ms): Fast = 25 / Medium = 200 / Slow = 1000 GMLAN DPID = job $AA 04/03/02 GMLAN PID = job $2C + $AA 04/03/02 GMLAN Memory Data = job $2D + $2C + $AA 04/03/02 Per ISO 14229 specification (ms): "vehicle-manufacturer-specific" ISO 14229 DID = job $2C + $2A 03/02/01 ISO 14229 Memory Data = job $2C + $2A 03/02/01 |
| Change condition | Allowed only for ISO 14229 and GMLAN items. Selects which Standalone Logging collections must be active for this signal to be requested. |
| Pack at half precision | If an item Priority = Periodic this packs only the signal's top half most significant bytes into a dynamic DPID. This allows packing more items, but with a sacrifice of precision. |
| Copy DID to ECU | Copies a DID definition from one "real" ECU to another in the diagnostic database. |
| Move DID to ECU | Allowed only for ISO 14229 DIDs with its source being a base/virtual/GMRDB ECU with USDT request ID = 0. Use this to copy DIDs from a base/virtual/GMRDB ECU with DID definitions to "real" ECUs that need DID definitions in the diagnostic database. The base/virtual/GMRDB ECU DID list will remain unchanged after using this menu selection. |
| Remove selected | Cuts selected signals from the list without copying them to the clipboard. |
| Cut | Cuts selected signals from the list and copies their information to the clipboard |
| Copy data | Copies all signal information to the clipboard in a tab delimited format that can be pasted into a spreadsheet application. |
| Paste | Pastes previously cut signals into the list. |
| Show Diagnostic Tweaker | Shows a viewing area on the right side of the Online tab. |
| Set Export Order | Sets the ordering of signals in CSV and MAT signal export files. |
This is step 5 in making a VS3ZIP script to operate neoVI in wireless mode.
Additional help can be found in the VehicleScape DAQ Standalone Logging application note within the Vehicle Spy help files.
The Standalone Logging tab generates a script that lets ICS hardware collect data on its own while disconnected from a computer.
Standalone Logging Page Layout (Setup Standalone Logging)
The Standalone Logging page has 2 major areas and described in Table 1.
The upper area has Collection setups that change appearance depending upon which method is being used in that collection.
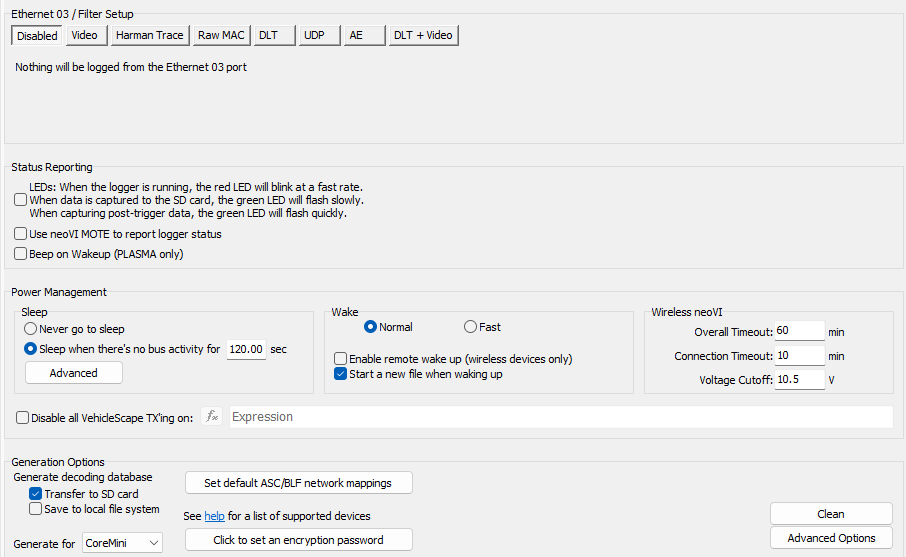
The bottom area contains important sections that do not change appearance because these settings affect ALL collections above.
Table 1: Standalone Logging Setup Areas
| Standalone Logging Area | Description |
| Collections and Methods | Collections define log file creation and they can use different methods to gather data. |
| The following settings affect ALL Standalone Logging collections | |
| Reporting Options | Options for physical logger feedback and Live Data reporting to a Wireless NeoVI website. |
| Power Management | Logger sleep and wakeup selections are made here. |
| Generate | Generates the final script and opens a dialog to send it to ICS hardware that supports standalone logging |
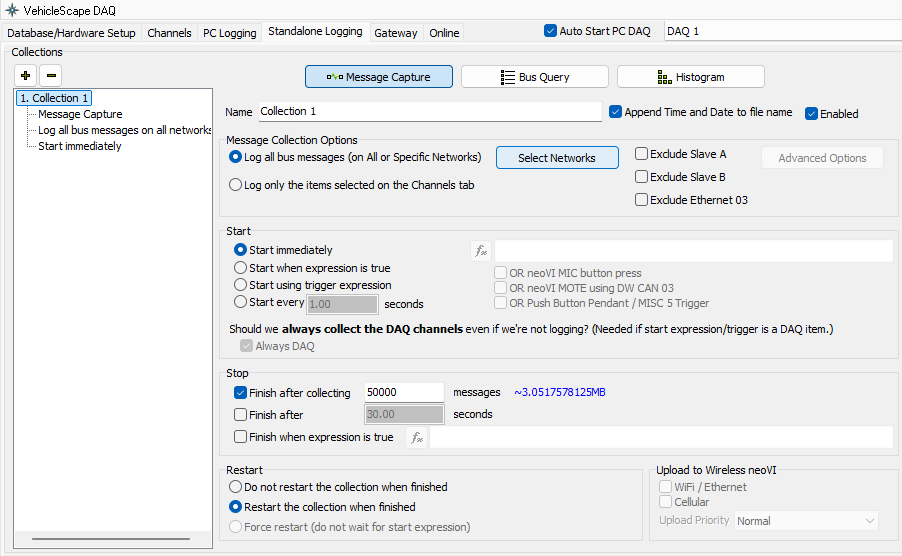
In Vehicle Spy, the VehicleScape DAQ Standalone Logging tab has 2 major areas. The top half, shown above, contains settings for this current collection selected. The bottom half, shown below, contains settings for all collectons. Click ‘Generate’ at the very bottom to compile CoreMini and create your .wivi file.
4.2 Troubleshooting Wireless neoVI website
For Wireless neoVI support, please contact Intrepid at:
Email: icssupport@intrepidcs.com
Phone: +1 586-731-7950 (Ext. 1)